Pages

Sunday 23 September 2018

Dress My Craft Floral Layout

Greetings Everyone

How have you been?
I am back again with my madness for Dress My Craft Banner Punch 
These punches are amazing and versatile.

Today I am have made some embellishment for my scrapbook layout using the Dress My Craft Banner Punch 
It's indeed very self explanatory and there is no rocket science in making these cute little embellishment.


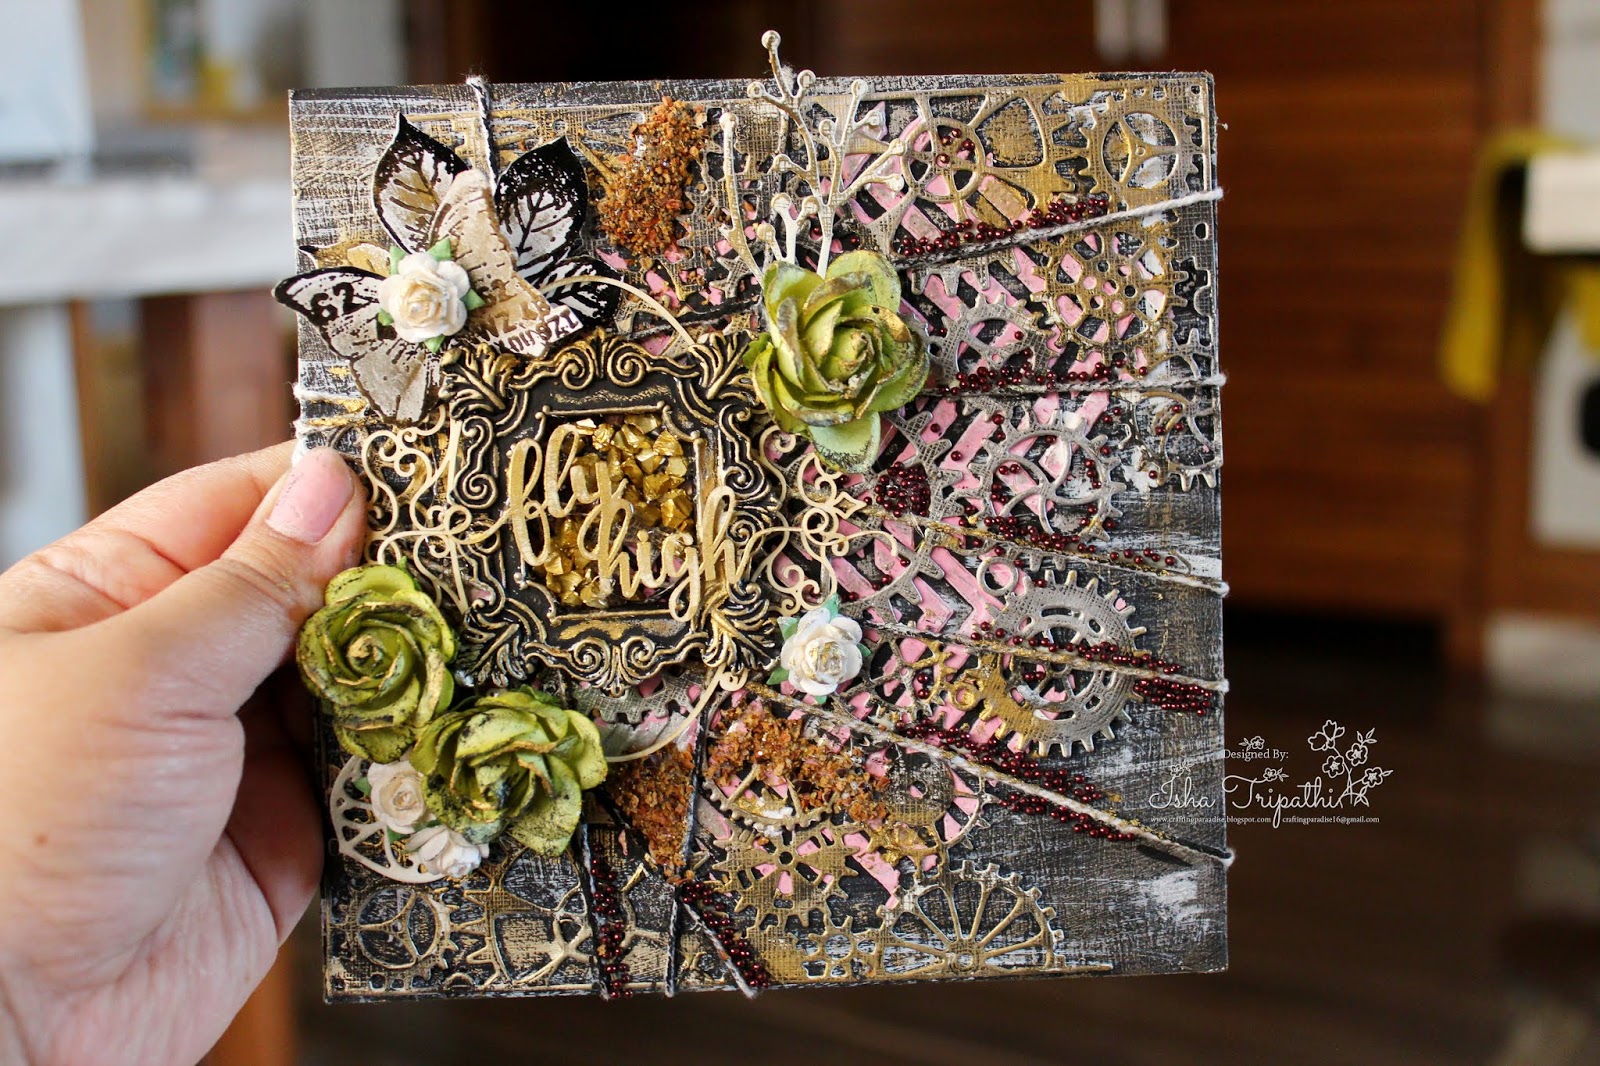
Here is my scrapbook layout!!
How is it ??

I am in love with DMC Floral Symphony Paper collection, it's chic beautiful and it does have beautiful soft colors to work with and the outcome is always amazing.


As you can see I have made those banners using my Dress My craft Banner punch and in no time I was able to make them.
Here is  a closer look for the same-


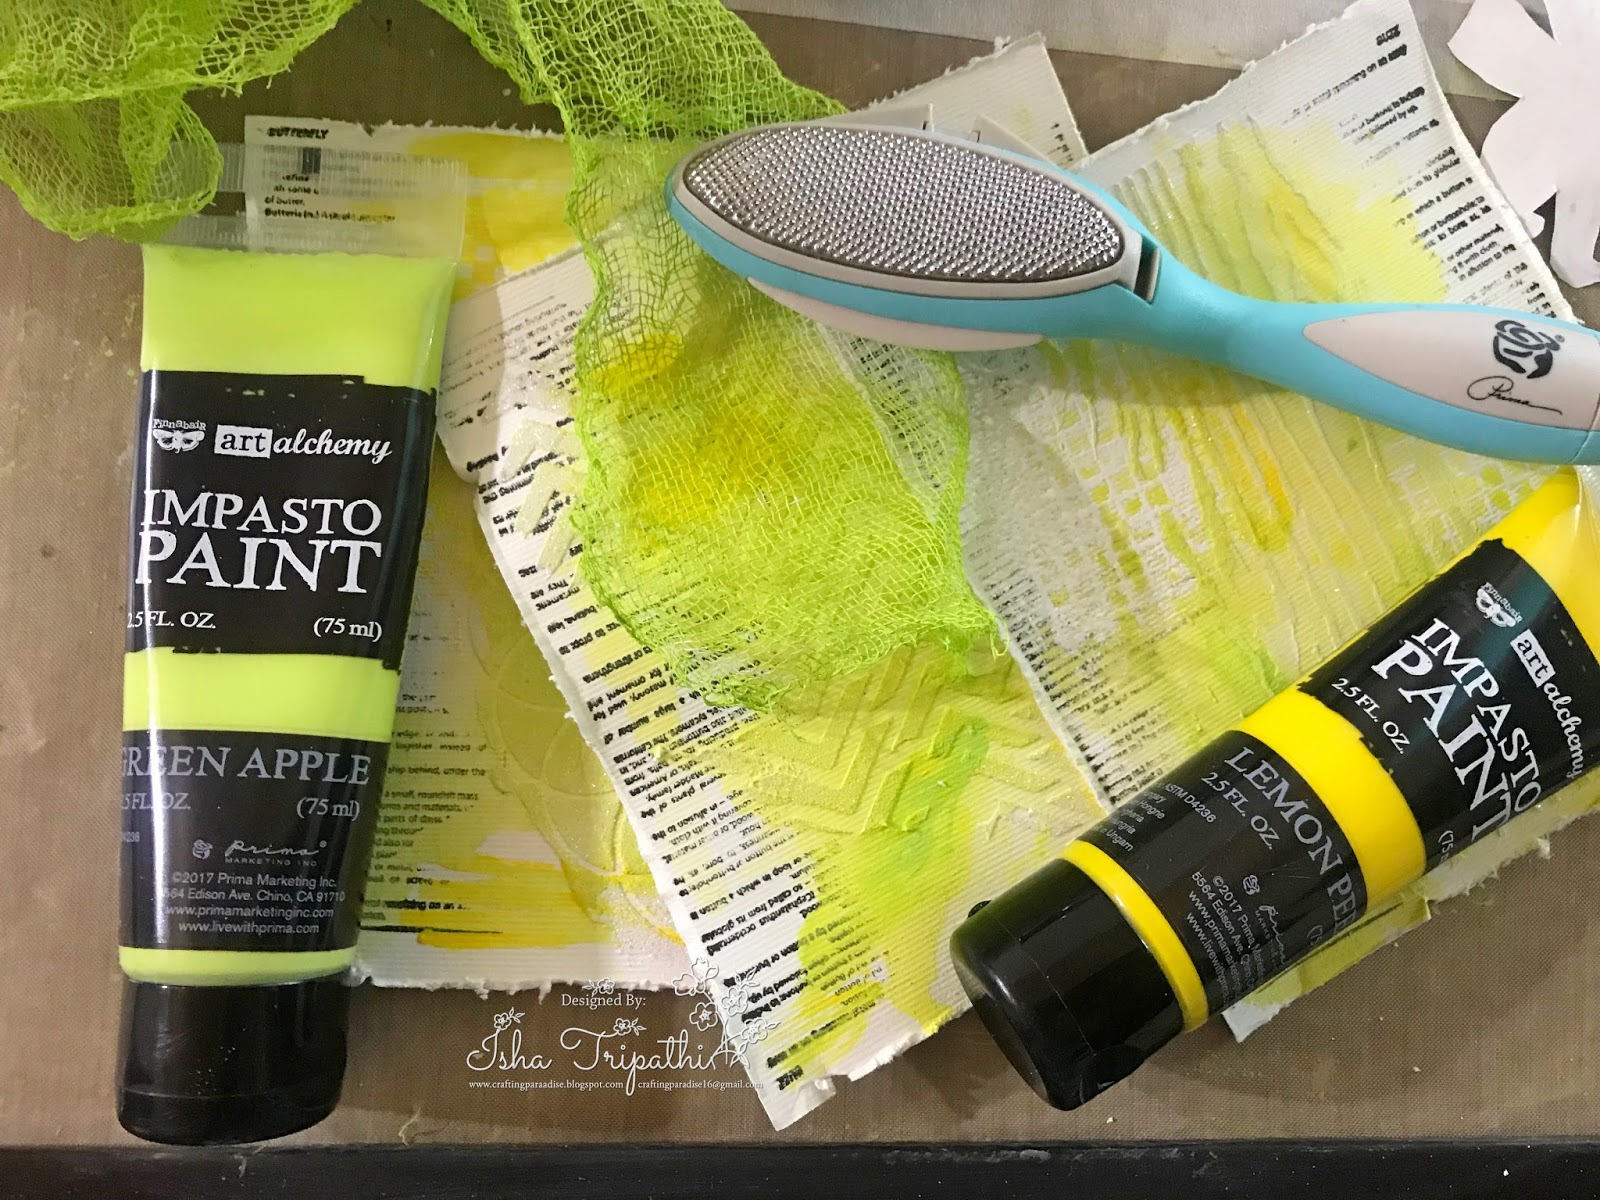
 How to make these banner- 

- Take any piece of cardstock I have used the scraps here and randomly cut in different sizes and finally trimmed the edges using DMC banner punch.
-I have layered each banner with different pieces of banner pasted on top of another.
- lastly I have used Dress My Craft Rainbow glitter and used them on the edges and prima art stones (mini) and colorful glitter balls. they have been adhered using prima soft mat transparent gel.


I am in love with Dress My craft Rainbow glitter and I have used them all over my layout. 
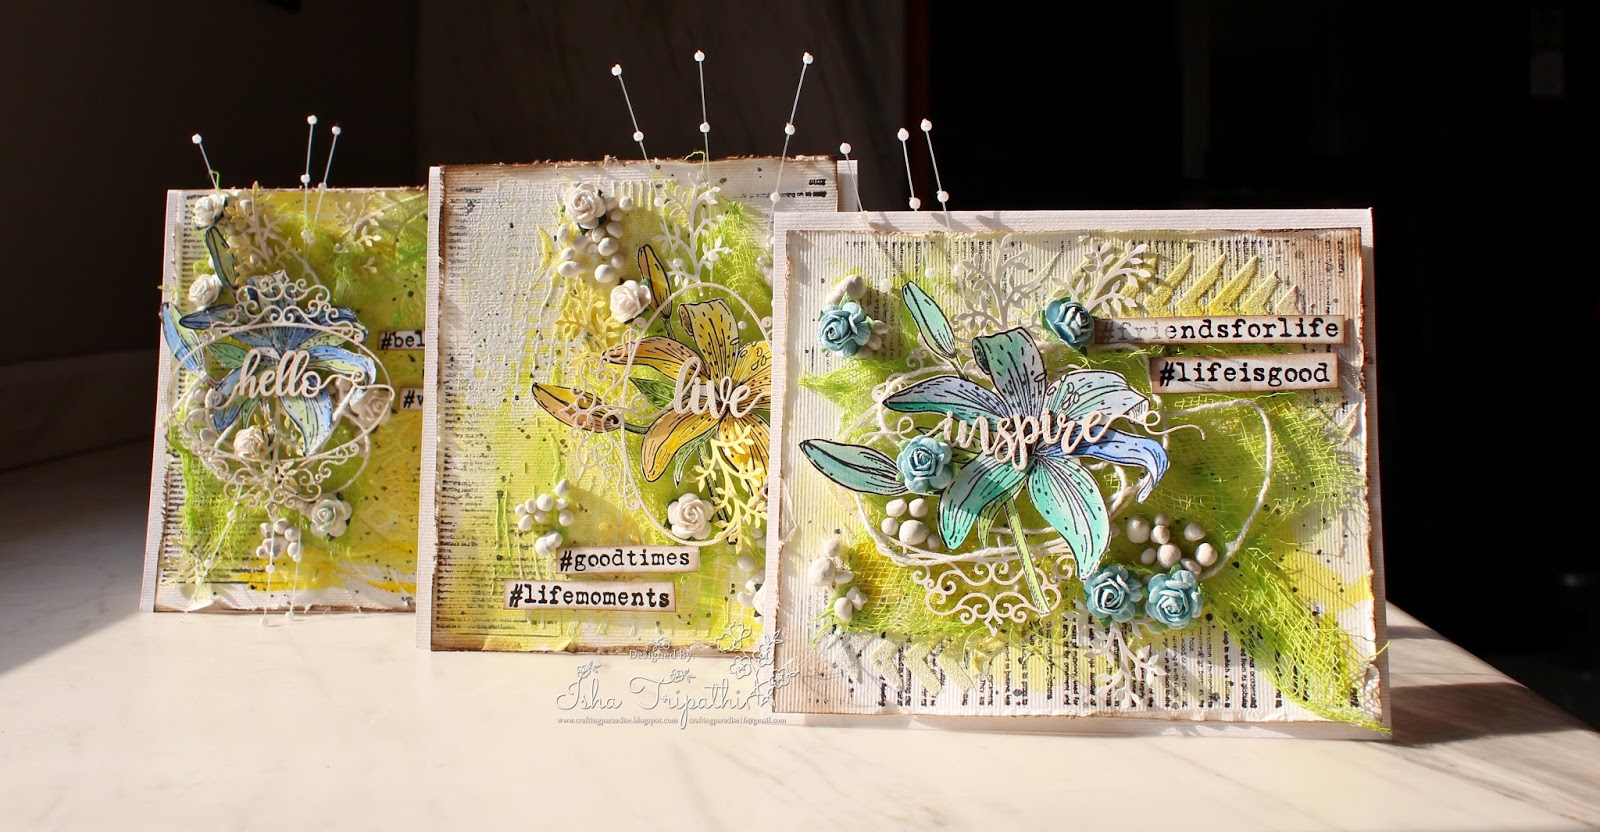
here are some close ups of the same.


Dress My Craft Rainbow Glitter 
I hope you like this easy peasy layout. I am linking all the products used at the end of the post.

I really hope I was able to inspire you all, Keeping checking the space for more inspirations by my fellow team mates.

Have a Nice day 
XOXO
Isha 


Product List :

GDBNCSVX222036589

TREAT BOXES : DRESS MY CRAFT RECTANGULAR TAG PUNCH

Greetings Everyone

How have you been .....
Today I have some really cool fun project to share with you all ... TREAT BOXES!!!

Since the festivity is around the corner and we definitely love to give gifts to our near and dear ones.
Keeping this idea in mind I decided to make cute treat little boxes using Dress My Craft Rectangular Tag Punch.

Have a Look

Making these treat boxes were super quick and I love love love my DMC Rectangular tag punch

I have Video Tutorial for you all, showcasing how I created these.
The idea is really very simple and with the same method/idea you can make different types of treat favor boxes.

VIDEO TUTORIAL 


I hope I was able to inspire you all and if in case you still not able to decide to buy your tag punches well it is the time BUY ONE now.... and believe me you wont regret buying it.


XOXO 
Isha 


Product List/Supplies used- 

Sunday 12 August 2018

CADENCE BETON EFFECT RELIEF PASTE & VINTAGE LEGEND GESSO - CANVAS called BEAUTIFUL

Greetings Everyone

How are you doing today??
I am back again with my cadence mania, focusing again on the gorgeous Cadence Beton effect relief paste and vintage legend antique gesso.

Today I have a canvas using the cadence products and believe me I am stunned by the outcome, it just look absolutely gorgeous.
Have a look

Cadence beton relief paste and vintage legend 

How is it ?? Did you liked it ....
well let me explain you the steps to create this beauty -

  • First of all choose your size of canvas you would like to work with, I have taken a small circle shaped canvas and randomly applied cadence beton effect using spatula.

  •  Now apply your choice of vinatge legend gesso all over.
  • Take TCW brick wall effect stencil 6x6" and apply beton effect relief paste all over the base.


                                   Isn't the effect amazing ..... I am in love this totally <3 

         Now you are ready to decorate your canvas with your choice of flowers or chipboards :)
I have decorated the canvas with some handmade flowers and mulberry flowers and adorable mudra chipzeb.

               Also I have made these cuties berries using styrofoam bud and DMC Rainbow glitter.
                                                  The big bloom in the center is handmade.


I hope I was able to inspire you all, don't forget to leave some love.
Keep checking the space for more amazing inspirations.

Happy crafting
XOXO
Isha

Product List-
Cadence Beton effect relief paste
Moss effect paint -light green
Moss effect paint - dark green
Vintage legend gesso - green
styrofoam bud
Mulberry leaves pinkish green
poppy rose lilac 
floral chipzeb mudra

Thursday 9 August 2018

CADENCE VERY CHALKY COLORS

Greetings everyone !!

Hope you all are doing great :)
I am back again with CADENCE, and I am getting addicted to CADENCE.
hahhaha.....

Today I will be talking about CADENCE VERY CHALKY COLORS.
Although I have already explained what does very chalky means, but for those are new to the term Very chalky colors, lemme explain again -

What is very chalky color ?? what does it mean by very chalky ??

Very chalky colors are Water based silky Matte, chalky finish paint with smooth distressing feature for a Vintage and Shabby Chic look. Covers easily the surfaces. Requires no priming or sanding before using. Adheres to even the slickest surfaces. One-coat coverage with most colors on most surfaces. Quick drying.Customize with waxes or varnishes to finish and protect the paint surface. Cleans up easily with soap and water. Non toxic. Certified by EN 71 & CE.

So I hope it is clear and now lets move ahead.....
I have made three beautiful mix media door signs/hanging using the cadence very chalky colors and Dress my craft floral symphony paper collection and this is beyond amazing.
Have a look...


Did you all liked it ?? I think they are cute :P

So let me share with you all how I created this door sign hanging

  • First of all I have painted the wooden/mdf door hanger using cadence very chalky colors.
    I have taken three different shades of very chalky colors wild thyme, french lenin and  palm royal.
  • Now once the very chalky color dries up (PS- It dries really quick), apply randomly brush strokes of white vintage legend gesso.
  • Allow it to dry naturally.
  • Now take your favorite set of pattern paper and stickers, here in my case I picked up floral symphony paper collection from dress my craft and matching motif sheet to decorate the base.Please check the images below, here you can see how beautiful they look just by simply adding papers and motifs.


I hope I was able to inspire you all .

XOXO
Happy crafting
Isha


Product List-


Tuesday 7 August 2018

Cadence Vintage Legend/ antique gesso and very chalky colors.

Greetings Everyone 

How are you doing today ......
I am back again with Cadence products. Today I will be sharing about Cadence Vintage Legend/ antique gesso and very chalky colors.


I have painted my mini trinket Chester with the gorgeous cadence vintage legend and chalky colors,

vintage legend cadence

Let me tell you what this Vintage Legend and very chalky color is about - 

1- VERY CHALKY COLORS  { source }
What is very chalky color ?? what does it mean by very chalky ?? all these questions popped up in my head when I first saw the product.

Very chalky colors are Water based silky Matte, chalky finish paint with smooth distressing feature for a Vintage and Shabby Chic look. Covers easily the surfaces. Requires no priming or sanding before using. Adheres to even the slickest surfaces. One-coat coverage with most colors on most surfaces. Quick drying.Customize with waxes or varnishes to finish and protect the paint surface. Cleans up easily with soap and water. Non toxic. Certified by EN 71 & CE.

Image Source
 2- VINTAGE LEGEND { source }
Vintage Legend is Water based, specially formulated gesso paint with different sizes particles inside and colors to create crushed antique vintage surface. All kinds of Cadence acrylic paints can be used as first coat. For metal and glass surfaces, Cadence Hybrid is recommended as first layer. Apply Vintage Legend over the first coat.  For last layer over Vintage Legend, Very Chalky is recommended. Wait minimum 12 hours before scraping strongly. Cadence Home Decor Wax can be used for protection or colored waxes for depth. Non-toxic. Certified by EN 71 & CE.  
These products can absolutely be used on any surface and that is the beauty of CADENCE.


So I hope you understand the basic nature of the product, Now I will detail out the steps how I have painted the Chester... Let's get started 

vintage legend cadence
  • First of all clear the base with dry clean cloth or tissue.
  • Now take your choice of very chalky color and paint the surface all over evenly.
  • You need to allow the base to completely dry before applying vintage legend. Its is best to naturally air dry the base or if you are impatient just like me use your heat gun.
  • Pick your choice of vintage legend shade, for my project I have picked blue, red and white. Now apply randomly blue color and red color and allow it to dry completely 
  • Now I have taken white vintage legend and randomly brushed it on top of the blue and red color. 
  • Finally I have decorated it with resin and mulberry flowers.   
Viola you are done, isn't that amazing. You can do the same on any base.


I hope I was bale to inspire you all to pick up the awesome cadence product from store.

Happy Crafting 
XOXO
Isha 


Product list 
Golden synthetic brush  
 Vintage Legend Antique Gesso - Bordeaux
Vintage Legend Antique Gesso - Fresco 
Vintage Legend Antique Gesso - Ecru 
Very Chalky Home Decor - Ultra Matt Velvety Akrilik Paint - French Linen 
mulberry rose  


CADENCE BETON EFFECT

Greetings Everyone
How have you been ?? It's been really long I have shared anything with you all.
Sorry for being MIA.

Today I shall be sharing How I altered my old wooden Frame using CADENCE BETON RELIEF PASTE.
In my Last post I have briefly summarized Cadence product properties which was used in CRAFTY FEAST 3, here's the link to my previous post.

So without wasting time presenting to you my altered wooden frame tdaaa .....
take a look 

Cadence Beton Relief Paste altered wooden frame
How is it ?? Did you liked it ??? I loved it :D

Cadence Beton Paste is amazing, it dries quick and is just perfect to give concrete look/effect to your project. The paste has some grains and fiber inside which adds extra texture to your project which is just beautiful.

Cadence Beton Relief Paste altered wooden frame
 How I altered the Wooden Frame ....

  • First of all I have cleaned the wooden frame with dry cloth to remove all dirt or any dust particle.
  • Now with help of spatula apply Cadence Beton effect relief paste all over the surface.
  • Once you have applied the paste, just by lifting the spatula you can messy effect as I have managed to achieve. (picture right after text for close up shot )
  • Next randomly apply green moss effect paint light and dark where ever you want.
  • I have used Dress my craft fresh green moss randomly and highlighted the same with prima art ingredients and candence art stones.
  • Lastly I have decorated the frame with using beautiful Bob n Betty Roseate paper collection Motif sheets, mudra chipzebs and prima shabby resins.
VIOLA you are good to go...
Wasn't that quick ?? yes I was able to Finnish this in 1 hour time.

Cadence beton relief paste effect close up


 I really hope you all liked it and I was able to inspire you all.
Do grab your bottles of Beton effect paste and create your own amazing projects.


Keep checking space for more fun inspiration.

XOXO
Isha

Product List.

Wednesday 23 May 2018

Fly High: Mixed Media

Greetings Everyone

How have you been?
It's me Isha here, Today I have mini mixed media project to share with all and for this I have used loads of Prima Marketing products.
All will be listed down below at the end of the post.

You can buy all the  supplies  CRAFTERS CORNER.

It's impossible to explain creativity. It's like asking a bird, 'How do you fly?' You just do. Eric Jerome Dickey
Read more at: https://www.brainyquote.com/topics/fly
Let's get back to today's project,

It's impossible to explain creativity. It's like asking a bird, 'How do you fly?' You just do. Eric Jerome Dickey
Read more at: https://www.brainyquote.com/topics/fl
"It's impossible to explain creativity. It's like asking a bird, 'How do you fly?' You just do.-Eric Gerome Dickey"

Take a look


Its super rustic and grungy and with minimum products you can achieve great textures.
I have a video tutorial on how I created the back ground which I will be linking below

                                                                        TUTORIAL


Did you like it ?
Here are some closed shots and details 


I hope I was able to inspire you all.
Keeping checking the space for some amazing inspiration from my fellow team members.

Have a nice day
Happy Crafting
XOXO
Isha

List of supplies:
Prima Art Basics Plaster paste
Mesdames Merlot artisan powder
Antoinette Pink - Artisan Powder
French Sage - Artisan Powder
Liquitex Gesso White
Palette Knife
Mudra chipzeb Elegant Frames - Chipboard Cutouts
Mudra chipzeb Words #1 - Chipboard Cutouts
Black Gesso
Opaque Matte - Modeling Paste
Art Alchemy Wax- Vintage gold, brocade green, silver and white gold
Mulberry micro mini roses
Mulberry flower green
Steampunk gear dies Memory box
Dove craft heat gun

Friday 11 May 2018

Hello : Inspire : Live Mixed Media Card set

Greetings Everyone

How have you been...
Today I have Trio card set to share with you all, and it was more of Mixed media
I had fun creating this Trio set. I made this set as my Inspirational post for Crafters Corner Blog.

So for this one I have picked up Impasto Paint yellow and apple green, It's such a beautiful color strikingly soft yet stands out pretty loud.
I wanted to give a summery cool and fresh look to this set.

So lets begin how I created this beautiful Trio cards.


STEP 1-
Take a piece of cardstock ( I have taken textured cardstock) measuring 5"x6" inches.
Now stamp using any script stamp set on the edges of the cardstock.


STEP 2-
In second step I have randomly stamped using versamark ink pad and heat embossed using ranger white embossing powder and yellow embossing powder.

STEP 3-
Now I am applying Art basics plaster paste using TCW stencil. In this step once I have applied paste, I have poured Dress My crafts Microfine glitter all over the paste while it was dry and heat set it.

                                Can you see the glitter ?? It looks absolutely pretty in person.

STEP 4-
Now once the paste is all dried up, I have applied Impasto paint with with sponge and spritz lot of water over the top of the paint. Take out excess water with help of tissue paper.
Now heat set the entire base once you have achieved the look you wanted.

 And lastly distress the edges with prima distressing tool. (you may use any )

STEP -5
Now decorate your card with your favorite elements { Mulberry flowers / stamped images/ charms }
I have used penny black stamp and water colored the image using Gansai Tambi water colors.


I have used very minimal elements Mudra chipzeb, stamped images, art stones, punched leave branch and mulberry flowers.
For sentiment I used stampers anonymous Hastags words stamp set from stash.
before pasting the base on final card I have distressed the edges using walnut distress ink from ranger.

I hope you all liked this set and I really hope I was able to inspire you all.
Do keep checking the space for more fun and creative inspirations.


List of supplies -
Gansai Tambi
walnut stain distress ink
Mudra Chipzeb
Impasto Paint
Art ingredients
Mulberry flowers
TCW Stencil