Pages

Friday, 20 April 2018

MIXED MEDIA TAGS @ Crafters Corner

Greetings everyone

How have you been :) I hope great.
I have two mixed media tags to share with you all today and
Surprisingly my DT kit for the month was super amazing, take a look


 Isn't it awesome, I just love impasto paint and art alchemy brilliance wax.
And this is my first set of super intricate chipzeb by Mudra, let me tell you these are beyond amazing super think and such fine cutting details totally blown away by the quality of the same.

So finally I decided to make set of mixed tags using these crazy supplies.
{All supplies used will be mentioned down below along with the links, so don't worry sit back and enjoy post}


Tda ... Here is my take on mixed media tags. I have simple tutorial and lets get started....


STEP BY STEP : TUTORIAL 

Step 1: 

To make my tags I used Sizzix Alterations tag die and white card textured card stock from my stash.

Step 2:
Select your choice of metal embellishments scraps resins etc etc whatever you want to you use, Just to let you know there is no LIMITATIONS.

Once I have selected my embellishments, I like to place them randomly and play around till the time I find perfect places for each one of them.

Step 3:
Now I have pasted all the embellishments using art basics 3D Gloss gel.

Step 4:
Once the gloss gel dries up, cover the entire tag with gesso. I have used single layer of liquitex white gesso.


 Step 5:
Now once the gesso dries up, apply impasto paints till your heart drop. I just love these two gorgeous colors from art alchemy and in fact store has the one of the awesome collection of impasto paints.


Step 6:

This is really one of the awesome products I have used, Memory Hardware by Frank Gracia. Love the muted tones. I have used Blue and pink color here.
In the above image the tag on the left I have dusted the artisian powder and I don't know whether you can spot the difference between the two tags but the one on the left looks more vintage and has a matte effect.

What is the product all about- 

Prima Marketing Frank Garcia Memory Hardware Artisian Powder. Use this fine and delicate colorized powders on resins, wood, paper, clay and more to create a vintage look! Great for revealing texture, detail and cracks. Mix with gesso or modeling paste or mix with water to create a custom spray. ( source: https://www.crafterscorner.in)


Step 7: 
Lastly to add some glamour to my tags I have brushed whole loads of art alchemy White gold wax on the chipzeb and all over my tag.


I hope you liked my tags and I was able to inspire you all.
Happy Crafting
And do keep checking the space for more exciting inspirations.

Supplies used:-
TAG DIE SIZZIX
Marquise Blue - Artisan Powder
jade impasto paint
 Raspberry pink impasto paint
Mono Multi Liquid Glue
Mudra Chipzeb
Metal Embellishments
Art stones - Finnabair

Saturday, 31 March 2018

DT POST CRAFTERS CORNER

Greetings Everyone

Hop over to crafters corner blog showcasing these gorgeous shabby chic card along with video tutorial.


Video tutorial


XOXO
Isha

Monday, 12 March 2018

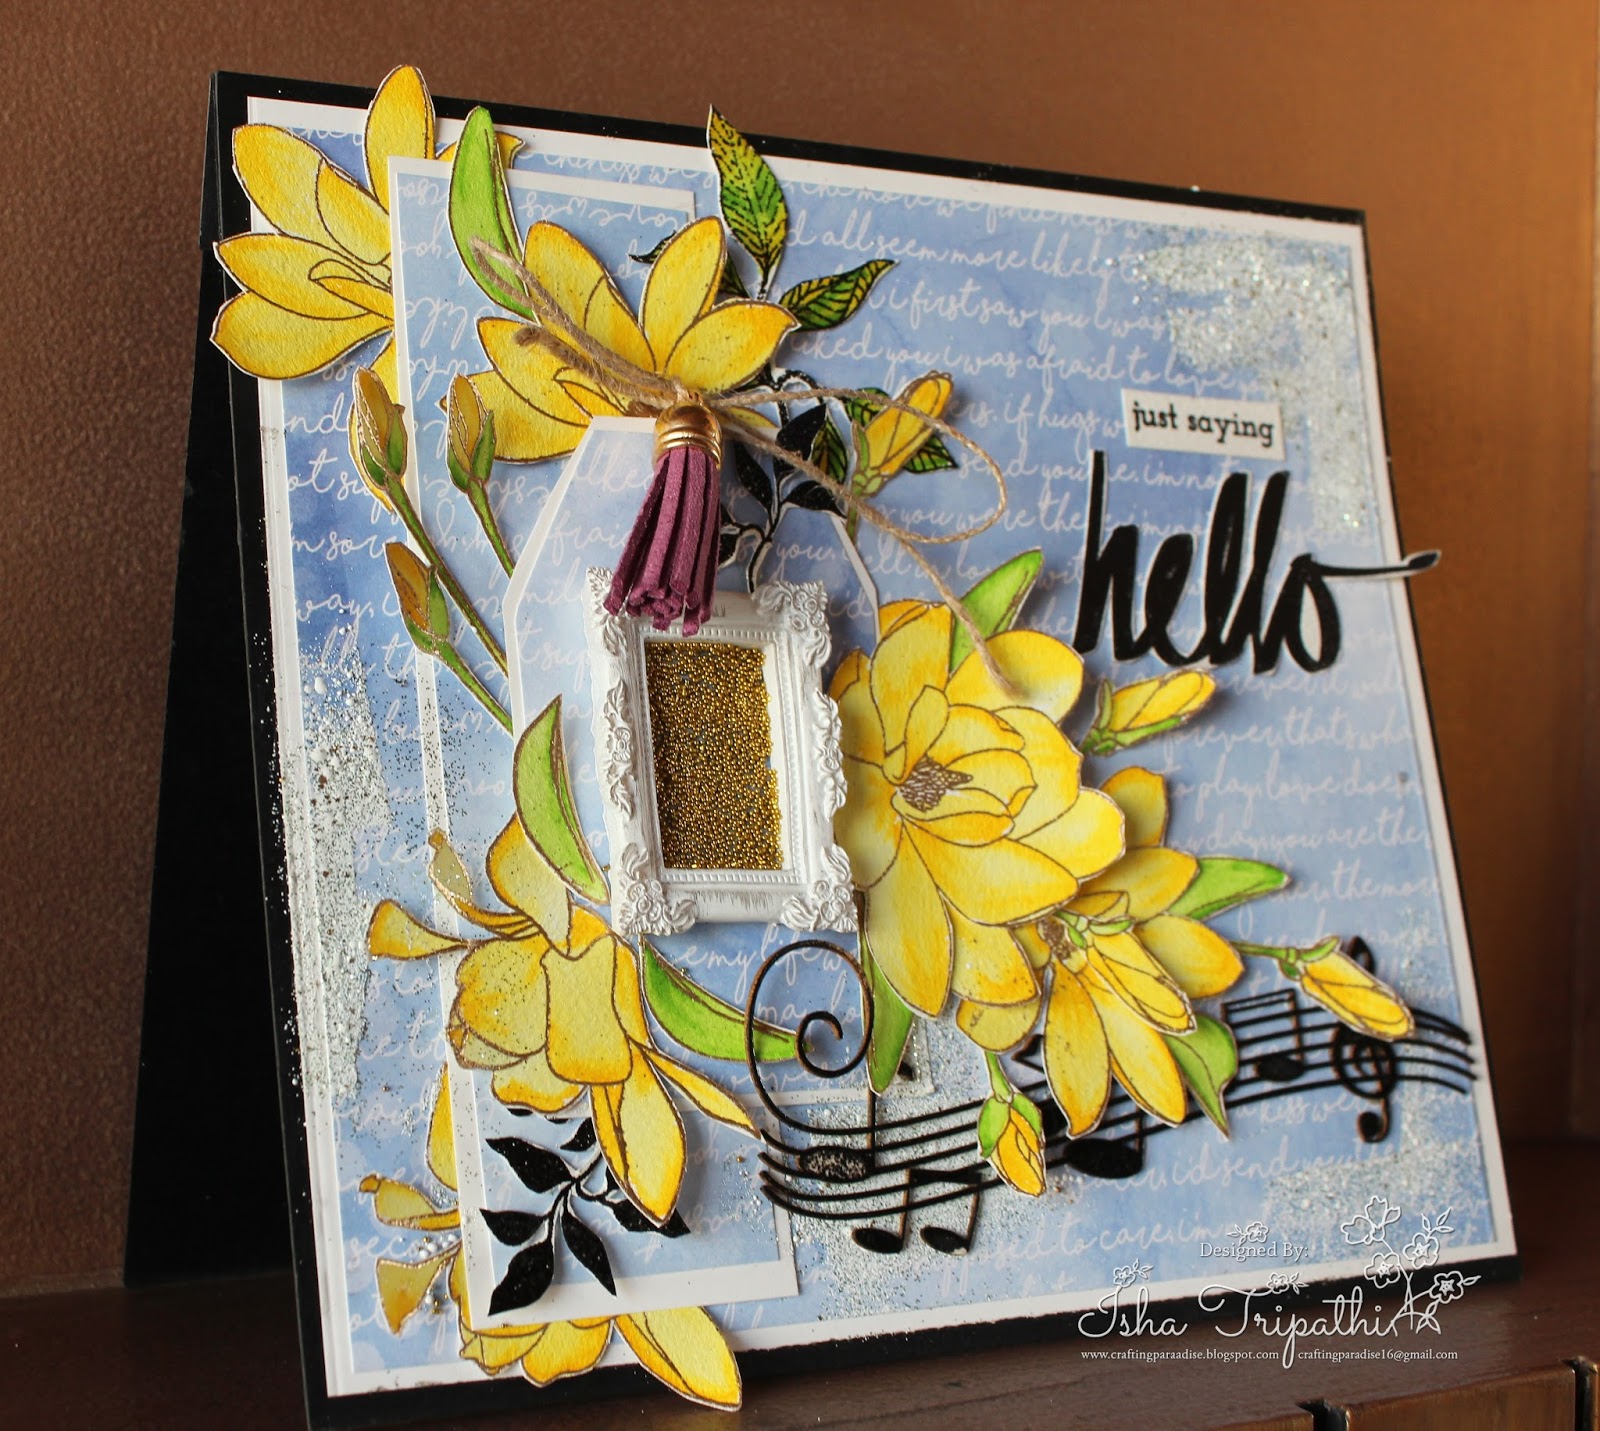
HELLO SUMMER

Good Morning Everyone 
I hope you all are doing great and having fun crafty time.
Today I have a very simple yet refreshing card to share with you all

I was very much confused as to what should I be sharing with you all as post inspiration. So I decided to make a super quick and easy card with my favorite Altenew stamp set.

I have pictures for every step how I have build this card.
Supplies used to make this card will be listed below towards the end of the post.
Let's begin!!

First of all I have stamped Altenew Magnolia flower stamp set using versamark embossing ink and heat set it with ranger gold embossing powder.

 Similarly I stamped Mudra stamp and stamped it versamark embossing ink and heat set it with black embossing powder by ranger.

After stamping I have colored the flowers and leaves using zig watercolor markers and I absolutely love them.
                                                     BUILDING BASE OF THE CARD


For card base I have used black card stock and layered it with white card stock and finally with beautiful Dress My Craft Pattern paper Hydrangea paper collection.
This script patter I loved the most, super light and towards muted purple color is just perfect for my pretty yellow blooms.

Now I have pasted 1.5 inch thick white card stock layered with patter paper to add some dimension to the base.
First I have pasted flowers and topped it with pattern paper strip. I absolutely loved this stamp set from Mudra. Next I have made a small tag using same script pattern paper from DMC.
You are absolutely free to make your placement on top of card.


For Tag I have used jute twine and tassel from dress my crafts.
Its a fun and simple card to make.

To add bit extra glamour to the card I have used prima shabby treasure frame and filled it with gold glitter balls.

Lastly I randomly sprinkled white embossing powder mixed with glitter on the edges of my card.
And for the sentiment again I have used Atenew stamp set.


                                                                           Close up!!
                           
                                   I hope you liked my card and was able to inspire you all.
                                       Don't forget to leave some love and Happy Crafting

                                                                           XOXO
                                                                             Isha

List of supplies Used -
Dress my craft Hydrangea paper collection 
Mudra leave stamp set 
Altenew STAMP - Mangnolias for her 
Versamark ink
Ranger embossing powder gold and black
Misti stamp set tool
Small Faux leather tassel - Dress my crafts
Natural Hem cord dress my craft
Mono Multi liquid glue.

Tuesday, 6 March 2018

Golden Canvas {Tutorial}

Hello  Everyone

Someone told me always Follow your Heart, so for today's post I have small canvas which I have made to gift to someone who always follow her heart .....


Its super easy and quick to make, and I find it perfect to gift someone just to remind them how special they are.

I have a step by step pictorial - How to build this GOLDEN CANVAS 

STEP 1
I have taken small canvas 8x8 inches and have applied one layer of Black Gesso.

 STEP 2 
Once gesso dries up, cover the entire surface with texture paste clear crackle
and allow to air dry or you are impatient like me use your heat gun to expedite the process.


Look at these cracks.... 

STEP 3

;
 Once the crackle dries, I have applied texture paste silver antique using ranger stencils bubble.

STEP 4  
 Once dried up, apply randomly brillance wax ( any color of your choice)

STEP 5  
Take Dress My craft pattern papers any print of your choice, cut thin strips and distress the edges all around the strips and squares using Vintage Photo.

 I have randomly pasted the pattern pieces around.

STEP 6 
To tone down or give the frame antique look the I have used ranger gold embossing powder


 Its time to assemble all the flowers and frames on canvas.
The pink big bloom is handmade and for the same I have used DMC glitter and thread pollens.
Rest other flowers are from Prima.

VIOLA its done :)


 I hope you liked my super easy canvas and I also hope was able to inspire you all.
Please find below list of supplies used to make this canvas.

XOXO
Isha 

Products used- 
Canvas - from stash 


Sunday, 4 February 2018

Gifting Idea : Valentine Treat Basket

Good Morning Everyone

How have you been?
Today I bring you some super easy treat baskets to gift to your loved ones. Since Valentines is around the corner and we all love to gift something or the other to our dear ones.


 Isn't it so lovely?? I have made this basket right from scratch and these floral beauties are also handmade. I have used lots of Dress my craft products here.

 Here are two sets {Treat basket and Mini card} that have created. It is super quick and easy to make and perfect to be gifted as token of love.

Dress My craft pattern paper that I have used to make this project are gorgeous Teenie Weenies collection.
The quality of paper is amazing it is super sturdy and thick. 


HOW TO MAKE BASKET -

In order to make this basket you will be needing some basic supplies,

List of Supplies - 
1- Thick piece of Card stock {12x12"}

STEP 1
To make this set of Basket and Mini Card, you will be needing 
- 1 pc of Card stock measuring 5" x 4"
- 2 pcs of Card stock measuring 5" x 2"
-2 pcs of Card stock measuring 4"x 2"

 STEP 2- 
You will be needing 4 pcs of 1" inch strip to join the above card stock together.
- 2 pcs of 1 inch strip x 5" inch in length
-2 pcs of 1 inch strip x 4" inch in length
-4 pcs of 1inch strip x 2" inch in length

All you need to do is score in half these 1 inch strips


STEP 3-
To make the basket band you will be needing 2" wide and 10" inch long piece of strip

STEP -4

Now glue all the pieces adjoining them with help of strips.

And decorate your basket using your favorite supplies from Crafters Corner store.

To make this card I have used 4"x3" inches of card stock and used beautiful DMC Teenie Weenies collection.

I hope you liked this fun easy peasy gifting solution this Valentine season.
And I hope I am able to inspire you.


All supplies used are available at Crafters Corner store.

XOXO
Isha 

List of Supplies- 


Tuesday, 15 August 2017

Graphic 45 Mini Album - Typography collection


Good Day Everyone

Welcome to brand to new Post

Today I have yet another cute little mini album to share, as part of my DT kit I have got set of Graphic 45 pattern papers - Typography Collection and I decided in seconds will make a Mini album.

                                                                           Take a look


I have a quick video tutorial and links for all the supplies at the end of the post,
Please avoid my mistakes I was really nervous while making the video.


Apologies ,, Please note the name of the Graphic 45 paper collection is TYPOGRAPHY .


I hope you really like the mini album 
For any query please feel free to ask

Supplies used:-
resin embellishments

XOXO 
Isha 


Saturday, 15 July 2017

TREAT BAGS

Good Morning Crafty people... Isha Here

Do you like treats ?? I am sure we all love treats.
We have so many occasions around where we share treats with each other, How about adding some personal touch to make it more special.

Today I will be sharing some of the gifting ideas which can be perfect for return favour gifts. In my post I have used sizzix purse die but you can use any dies to make your cute little treat bags.


                                                              Aren't they CUTE ???

Making these bags was so much fun and I actually loved the way we can use our supplies to make perfect gifting solutions.
I have fun video tutorial where you can see How I have constructed these treat bags using my Dress my craft Card stock - floral oriental collection. These card stock are quiet sturdy actually with 285 gsm of weight. I have used many more DMC supplies but my personal favourite SPARKLING DUST.

 Let's take a look how to make these treat bags - VIDEO TUTORIAL


Please avoid tiny miny errors have made in video.

                       
What say ?? Did you like these
Here are some more pictures, Sparkling dust add so much of Glamour to projects.


I have incorporated almost all the details in the video above, just in case if anything is left out please put your queries down below, will be happy to help.


Supplies used-
Dress my craft floral oreintal collection 
Dress my craft sparkling dust
Dress my craft Little hearts 
Multi medium gloss 
Mulberry flowers 
MFT- Proper pin strips pattern papers 6x6
MFT- Tiny check pattern paper 6x6
Sizzix purse die 

Happy Crafting and have a nice day
XOXO
Isha